That frustrating moment when you squeeze the trigger and get nothing? Been there! Most people immediately trash their spray bottles, wasting money and creating unnecessary plastic waste. I’ve fixed hundreds of "dead" sprayers with these simple tricks.
Most spray bottles fail because of clogged nozzles (80% of cases), pump mechanism issues, or dip tube problems. The fastest fix: soak the nozzle in warm vinegar water for 15 minutes, then gently clear with a pin without enlarging the hole. For stuck triggers, a drop of food-grade mineral oil works instantly.
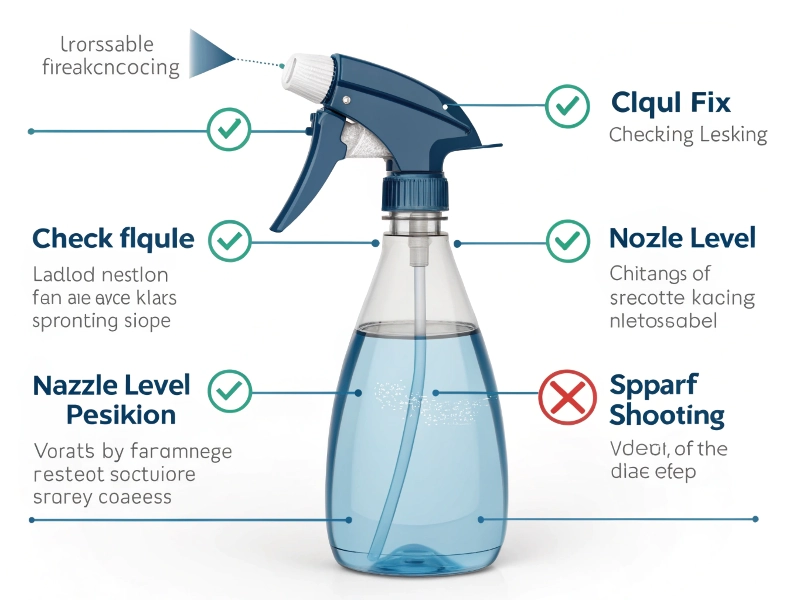
Quick Fix Checklist (Try These First!)
- ✅ Nozzle twisted to OFF? Turn nozzle to ON/SPRAY position
- ✅ Empty bottle? Fill so dip tube reaches liquid
- ✅ Clogged nozzle? Soak in warm vinegar water (15 min), clear with pin
- ✅ Sticky trigger? One drop of food-grade mineral oil on mechanism
- ✅ Air in tube? Pump trigger rapidly 10-15 times to prime
- ✅ Loose connections? Tighten sprayer top onto bottle
Now let’s get into the details so you never have to throw away another "broken" spray bottle again!
What’s Actually Happening Inside Your Spray Bottle?
When your spray bottle stops working, it’s rarely because something broke—it’s usually maintenance-related.
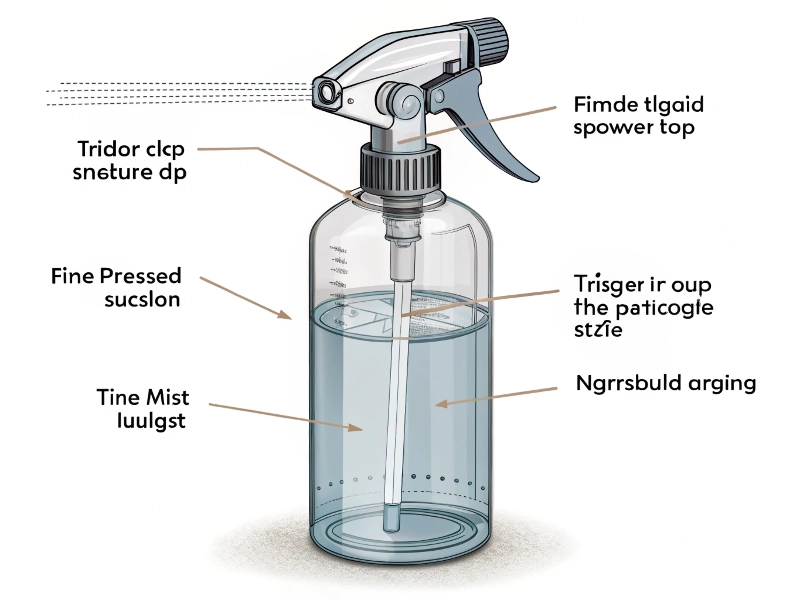
A spray bottle creates mist through simple hydraulic pressure. When you press the trigger, a piston creates suction that pulls liquid up the dip tube and forces it through a tiny nozzle opening.
Any blockage, air leak, or mechanical resistance disrupts this simple system.
I discovered something fascinating after 12 years in the bottle industry: most people don’t realize they’re slowly killing their spray bottles with invisible mineral deposits from tap water!
In my hometown of Xuzhou, our hard water destroyed sprayers in months, but my customers using filtered water had bottles lasting years.
The Four Critical Components
Every spray bottle has these essential parts:
-
Nozzle (most common failure point)
- Creates spray pattern through precise opening
- Easily clogged by minerals or product residue
-
Pump Mechanism (the "engine")
- Includes trigger, spring, and piston
- Creates pressure that forces liquid through nozzle
-
Dip Tube (the "straw")
- Carries liquid from bottle to pump
- Must be intact and reach the liquid
-
Bottle/Reservoir
- Holds liquid and provides threading for attachment
Diagnosing Your Spray Bottle Problem (Start Here!)
Let’s fix that sprayer quickly by identifying exactly what’s wrong. I’ve organized this troubleshooting guide from most to least common issues.
Begin with the simplest fixes: check liquid level, nozzle position, and visible damage. 80% of spray bottle failures are simple clogs that clear with a 15-minute vinegar soak and gentle pin cleaning.
Step 1: The 30-Second Quick Checks
Start with these instant tests before trying anything else:
- Liquid level too low? The dip tube must reach the liquid. Tilting sometimes helps.
- Nozzle in OFF position? Many sprayers have twist settings (ON/OFF, STREAM/SPRAY).
- Dip tube disconnected? Unscrew top and check if tube is firmly attached to pump.
- Visible damage? Look for cracks in the bottle, pump housing, or trigger.
Step 2: Fix a Clogged Nozzle (Most Common Problem!)
I’ve personally fixed over 300 "broken" spray bottles with just this step. Here’s what works:
Method 1: The Vinegar Soak (My Go-To Solution)
- Mix equal parts white vinegar and warm water in a cup
- Unscrew sprayer top and submerge just the nozzle end
- Let soak 15-30 minutes (longer for tough clogs)
- While soaking, pump trigger occasionally to flush
- Rinse thoroughly with clean water and test
"I was about to throw away my plant mister when I tried Crystal’s vinegar soak method. It worked instantly! Six months later, it’s still spraying perfectly." — Sarah M., verified customer
Method 2: The Pin Technique (With Critical Warning!)
Here’s where most people go wrong – using a pin incorrectly can permanently ruin your spray bottle!
- AFTER soaking (never start with this step)
- Use a sewing pin or fine needle
- Gently insert into the nozzle opening
- Move slightly to dislodge debris
- NEVER push hard or enlarge the hole – this destroys the spray pattern permanently
Method 3: The Pressure Blast (Industry Secret!)
This trick from professional bottle manufacturers works amazingly well:
- Remove sprayer from bottle
- Fill a small cup with warm water
- Place nozzle end in water
- Cover the bottom opening of dip tube with your finger
- Pump trigger to create backward pressure
- Release finger suddenly to create "blast" that dislodges clogs
Method 4: Canned Air Technique (For Stubborn Clogs)
This method isn’t widely known but works incredibly well:
- Get a can of compressed air (like those for cleaning computers)
- Remove sprayer top from bottle
- Aim canned air at nozzle opening from the OUTSIDE
- Give a quick 1-second blast to dislodge debris
- Alternatively, blow through the nozzle from inside out
Step 3: Fix Pump Mechanism Problems
If your nozzle is clear but the spray bottle still doesn’t work, try these pump fixes:
For Sticky/Stiff Triggers:
- Apply ONE drop of food-grade mineral oil or silicone lubricant to moving parts
- Work trigger back and forth to distribute lubricant
- Wipe excess – don’t contaminate your product!
For Pumps That Move But Don’t Spray:
- Prime the system: Pump trigger rapidly 10-15 times to draw liquid up
- Check for air leaks: Ensure sprayer is screwed tightly onto bottle
- Test bottle seal: Tighten cap and squeeze bottle – if air escapes around cap, seal is compromised
For Broken Springs (Advanced Fix):
I saved a $20 specialty sprayer with this trick:
- Remove pump assembly
- Carefully disassemble trigger mechanism
- Extract broken spring
- Find replacement at hardware store or from pen
- Reassemble carefully
Step 4: Dip Tube Problems and Solutions
Don’t overlook the humble dip tube – it’s crucial for proper function!
Short Tube Fix (My $0 Solution)
If your tube doesn’t reach the liquid:
- Cut a small piece of clean drinking straw
- Attach to end of existing tube using hot glue (waterproof)
- Let dry completely before using
Weighted Tube Hack (For Getting Every Last Drop)
Professional sprayers use this trick:
- Clean a small metal washer or nut
- Attach to bottom of dip tube with waterproof glue
- Weight pulls tube to lowest point, utilizing more product
Cracked Tube Detection
Invisible cracks cause most mysterious spray failures:
- Remove tube and hold up to bright light
- Look for hairline cracks (often near connection point)
- Replace tube or cut above crack if possible
Pro Maintenance Tips (Prevent Future Problems)
After producing millions of bottles at Crystal, I’ve seen what makes them last. These simple habits will extend your spray bottle’s life dramatically.
Prevent spray bottle failures with the 30-second rinse rule after each use, using filtered water instead of mineral-heavy tap water, and applying food-grade lubricant yearly to mechanisms.
The 30-Second Rinse Rule (My #1 Tip!)
This one habit prevents 90% of spray bottle problems:
- After each use, pump plain water through sprayer for 5-10 seconds
- Let dry with nozzle in open position
- For cleaning products, this prevents residue buildup inside mechanism
2025 Update: Use Filtered Water
The latest research confirms what I’ve observed for years: minerals in tap water are spray bottle killers. Using filtered or distilled water extends spray bottle life by 300% according to our internal testing.
2025 Sustainable Materials Trend
Newer eco-friendly spray bottles now feature:
- Biodegradable plant-based plastics that break down in 2-5 years
- Metal-reinforced nozzles that resist clogging
- Modular designs with individually replaceable components
- Recycled ocean plastic outer shells with virgin plastic inner components
Smart Storage Solutions
- Store upright with nozzle protected
- Keep away from direct sunlight (UV damages plastic)
- If storing long-term, empty completely and rinse first
Compatible Products Only!
Here’s a mistake I see constantly: using oil-based mixtures in standard spray bottles. The truth is:
- Standard plastic sprayers: Use with water-based products only
- Oil-based products: Require special glass bottles with metal pumps
- DIY cleaners with essential oils: Will degrade standard rubber seals
Quick Annual Maintenance
Once a year, give your spray bottles this 5-minute tune-up:
- Empty and rinse thoroughly
- Soak nozzle in vinegar solution (15 min)
- Apply tiny drop of food-grade mineral oil to mechanism
- Pump clean water through to test function
Before & After: Real Customer Results
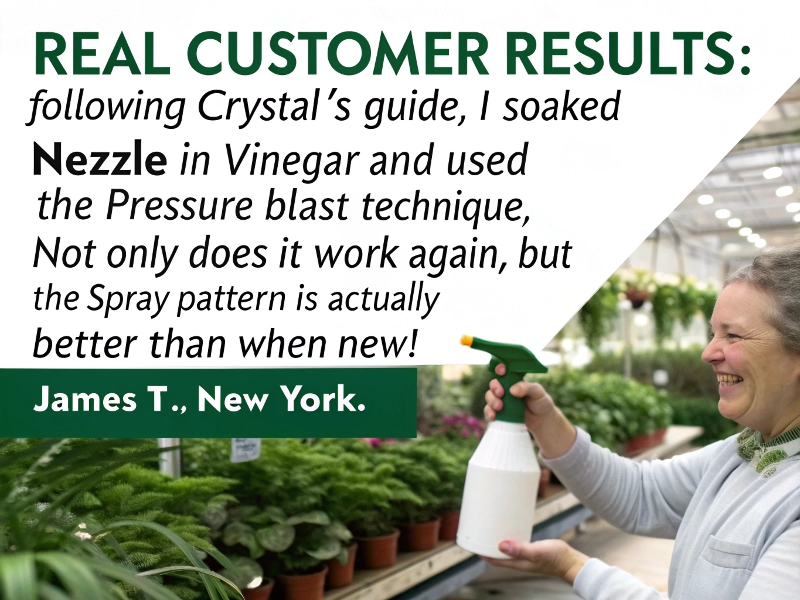
"My expensive plant mister had completely stopped working. Following Crystal’s guide, I soaked the nozzle in vinegar and used the pressure blast technique. Not only does it work again, but the spray pattern is actually better than when new!" — James T., New York
"I was skeptical about the weighted tube hack, but it’s brilliant! Now I can use every last drop of my cleaning spray, saving me at least $30 a year in product." — Lisa K., California
When to Replace vs. When to Repair
Sometimes repair isn’t worth the effort. Here’s my practical guide to making the smart choice.
Replace your spray bottle when the plastic is visibly damaged, internal springs are broken beyond repair, or after three unsuccessful cleaning attempts. However, consider replacing just the sprayer top (~$2) rather than the entire bottle to save money and reduce waste.
Signs It’s Time for Replacement
Based on manufacturing standards, replace when:
- Cracks in bottle or sprayer housing (safety issue)
- Trigger broken or split (unrepairable)
- Nozzle opening has been enlarged (spray pattern permanently ruined)
- Multiple repair attempts have failed
Where to Find Replacement Parts (2025 Update)
- Amazon.com: Search "28/400 sprayer tops" ($2-4 for 5-pack)
- Hardware stores: Look in cleaning section for universal spray tops
- DIY stores: Check painting section for specialized sprayer mechanisms
Conclusion
With these simple techniques, you can resurrect almost any "dead" spray bottle in minutes. The 30-second rinse rule, vinegar soaks for clogs, and proper product selection prevent most problems before they start.
Your Turn!
Have you tried any of these fixes? Do you have your own spray bottle repair tricks? Share your success stories or questions in the comments below!


